VPN configuration on Android
The following instructions are based on Android 9, but they have also been tested in other android versions without any problems.
Installation, Konfiguration & Nutzung

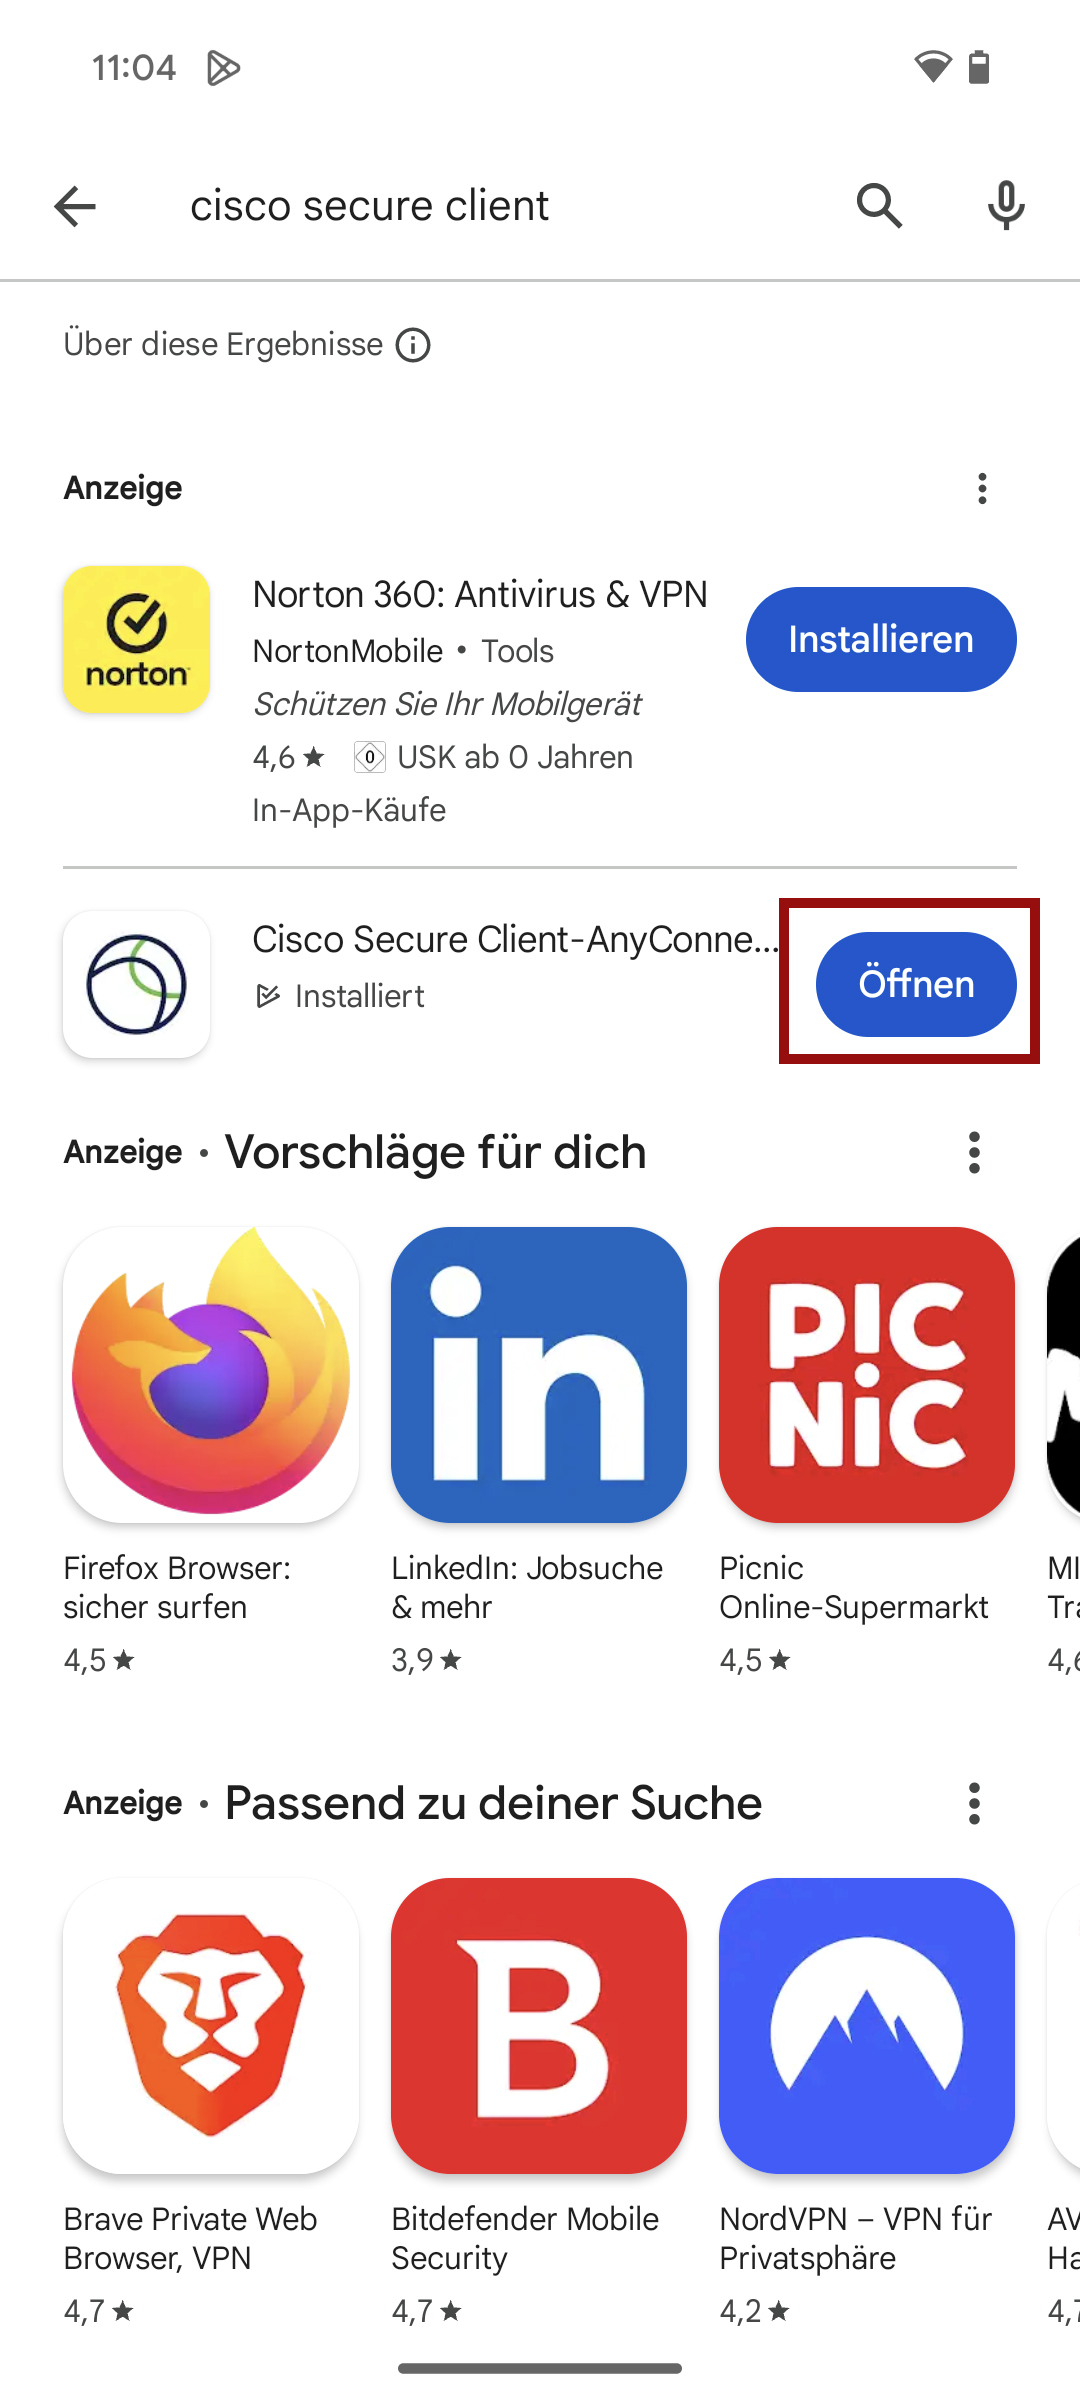

- Öffnen Sie den Google Play Store auf Ihrem Gerät und suchen Sie nach "Cisco Secure Client". Tippen Sie bei der entsprechenden App auf "Installieren".
- Nach der Installation tippen Sie auf "Öffnen" oder starten die App über die installierten Apps.
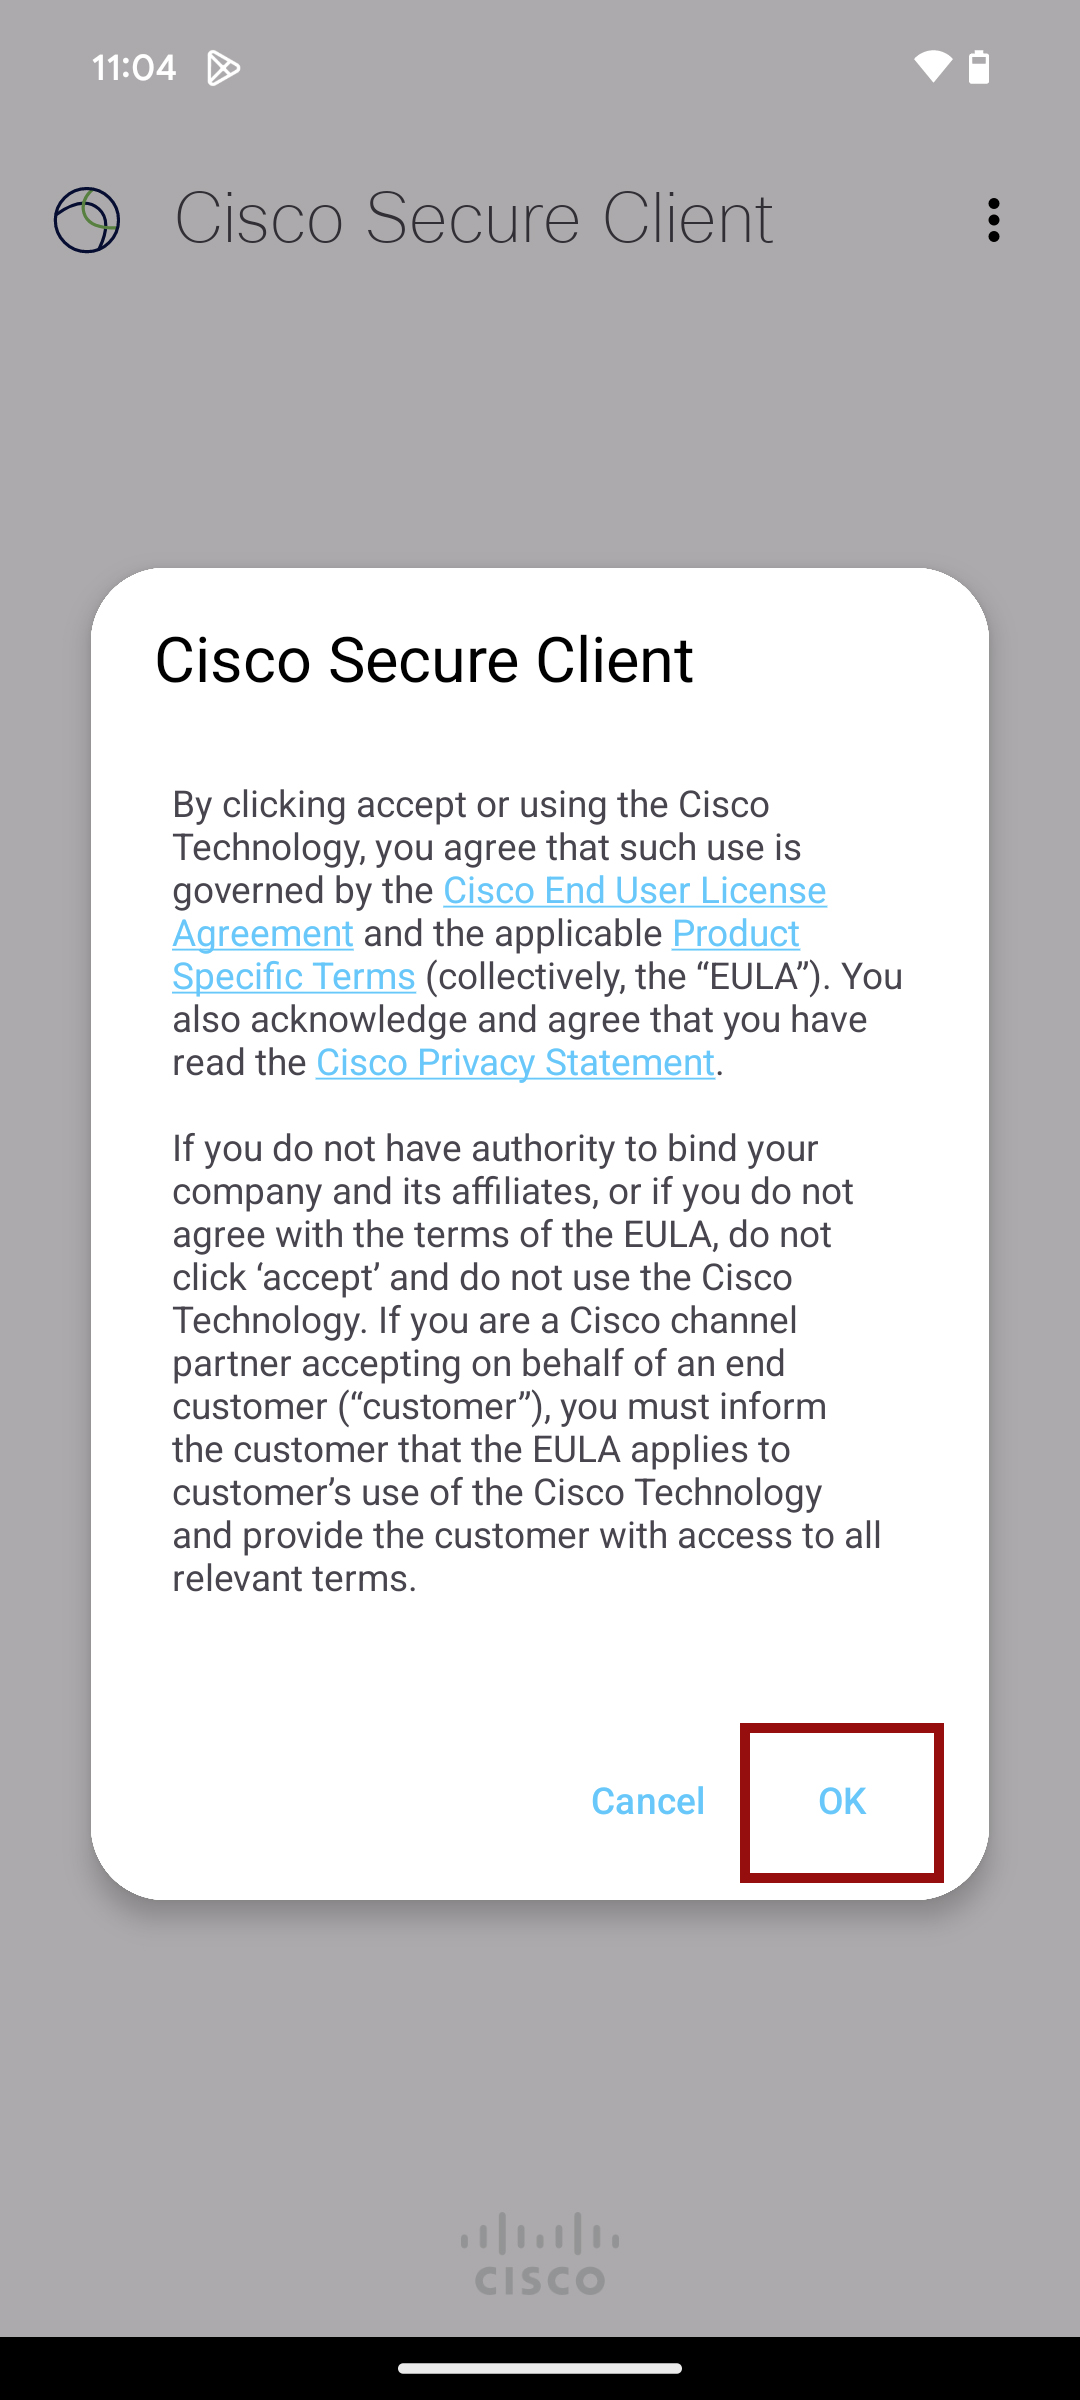
- Bestätigen Sie die Lizenzvereinbarung, indem Sie auf "Ok" tippen.
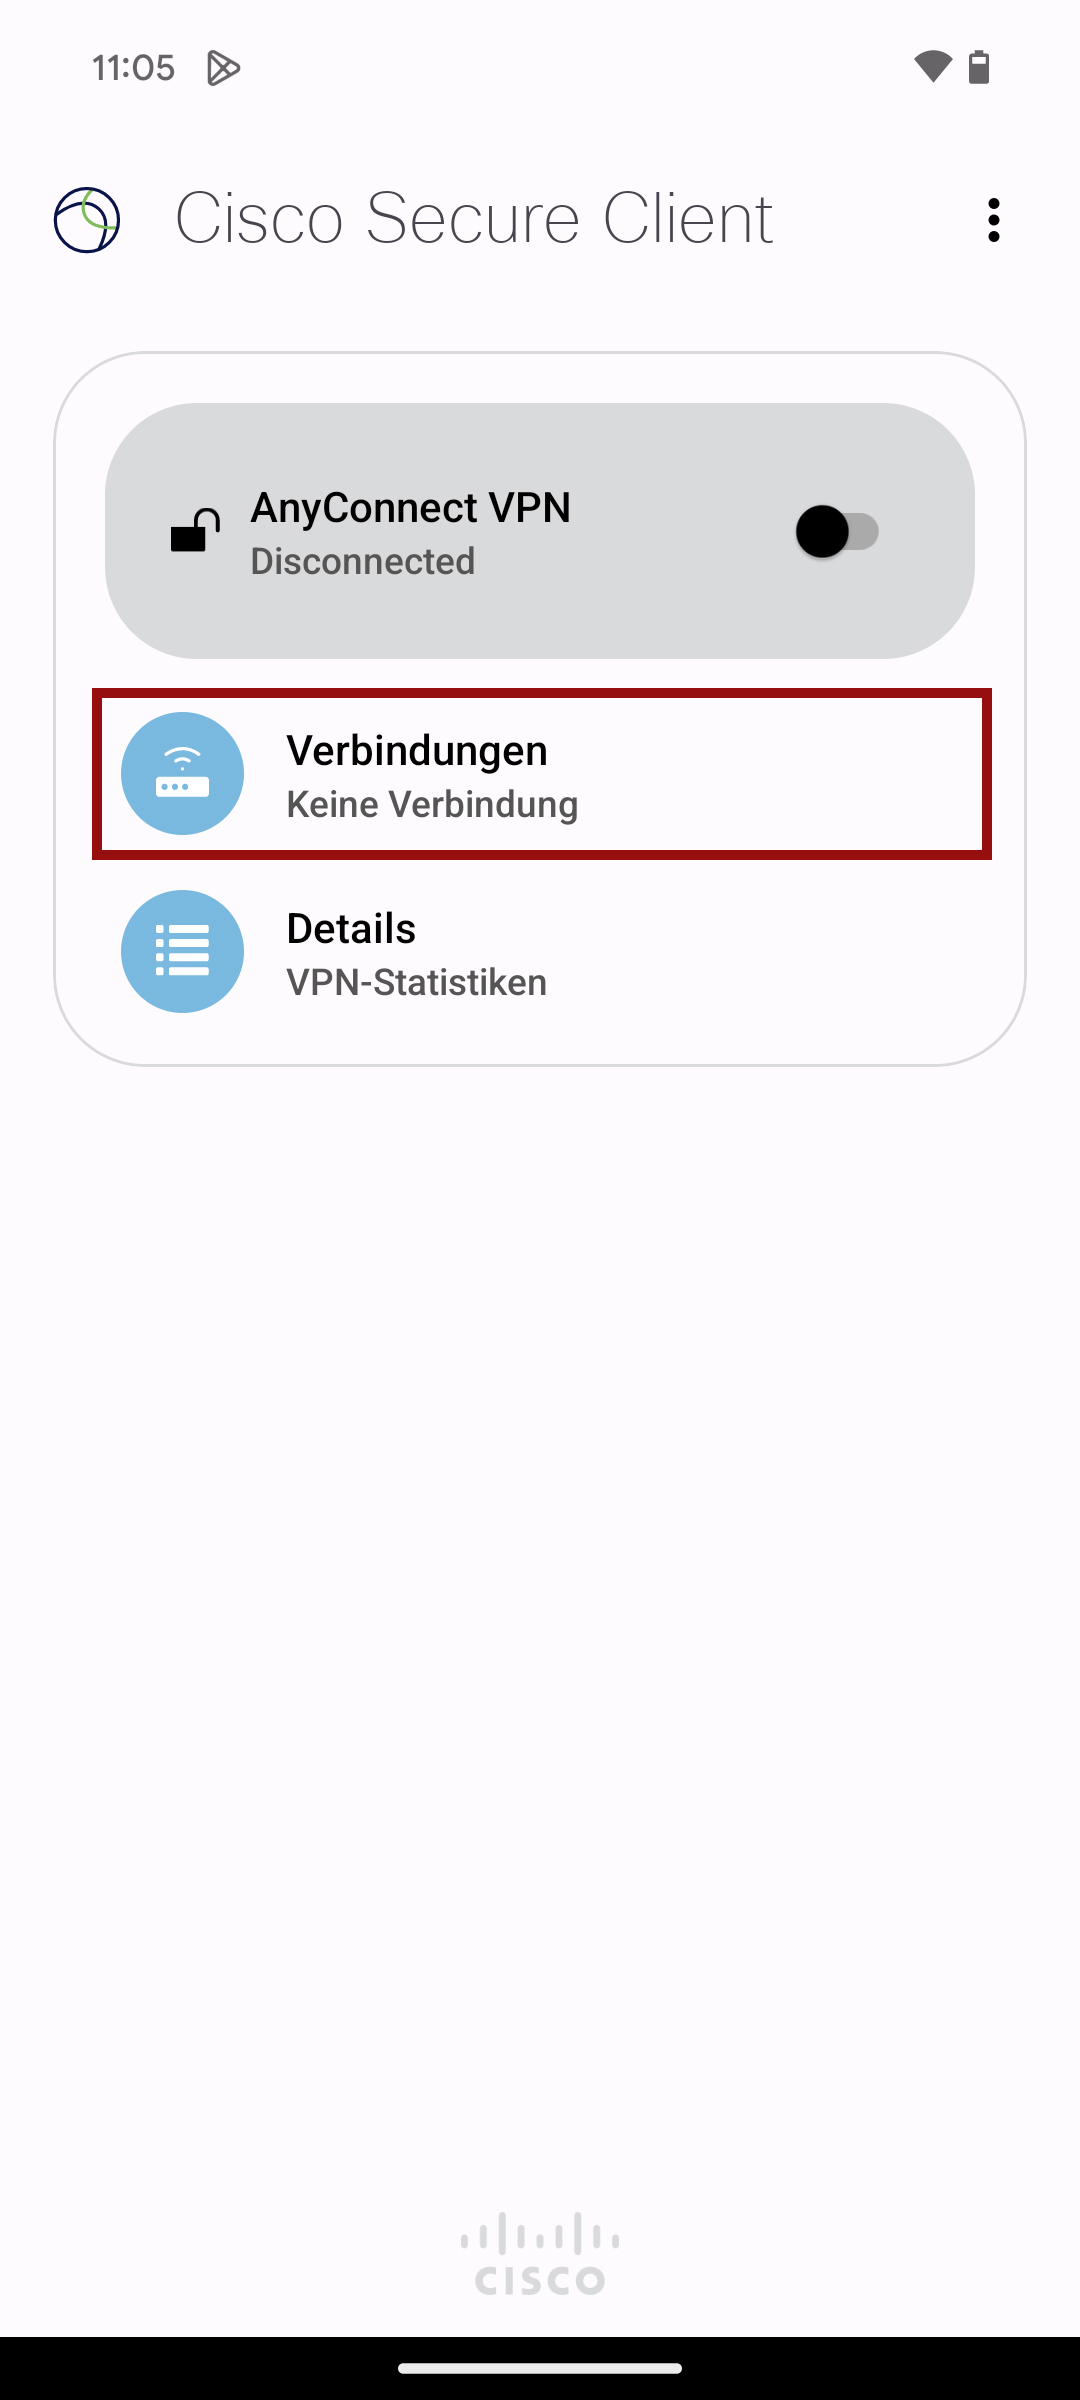
- Tippen Sie nun auf Verbindungen, um Ihre eingerichteten Verbindungen zu verwalten.
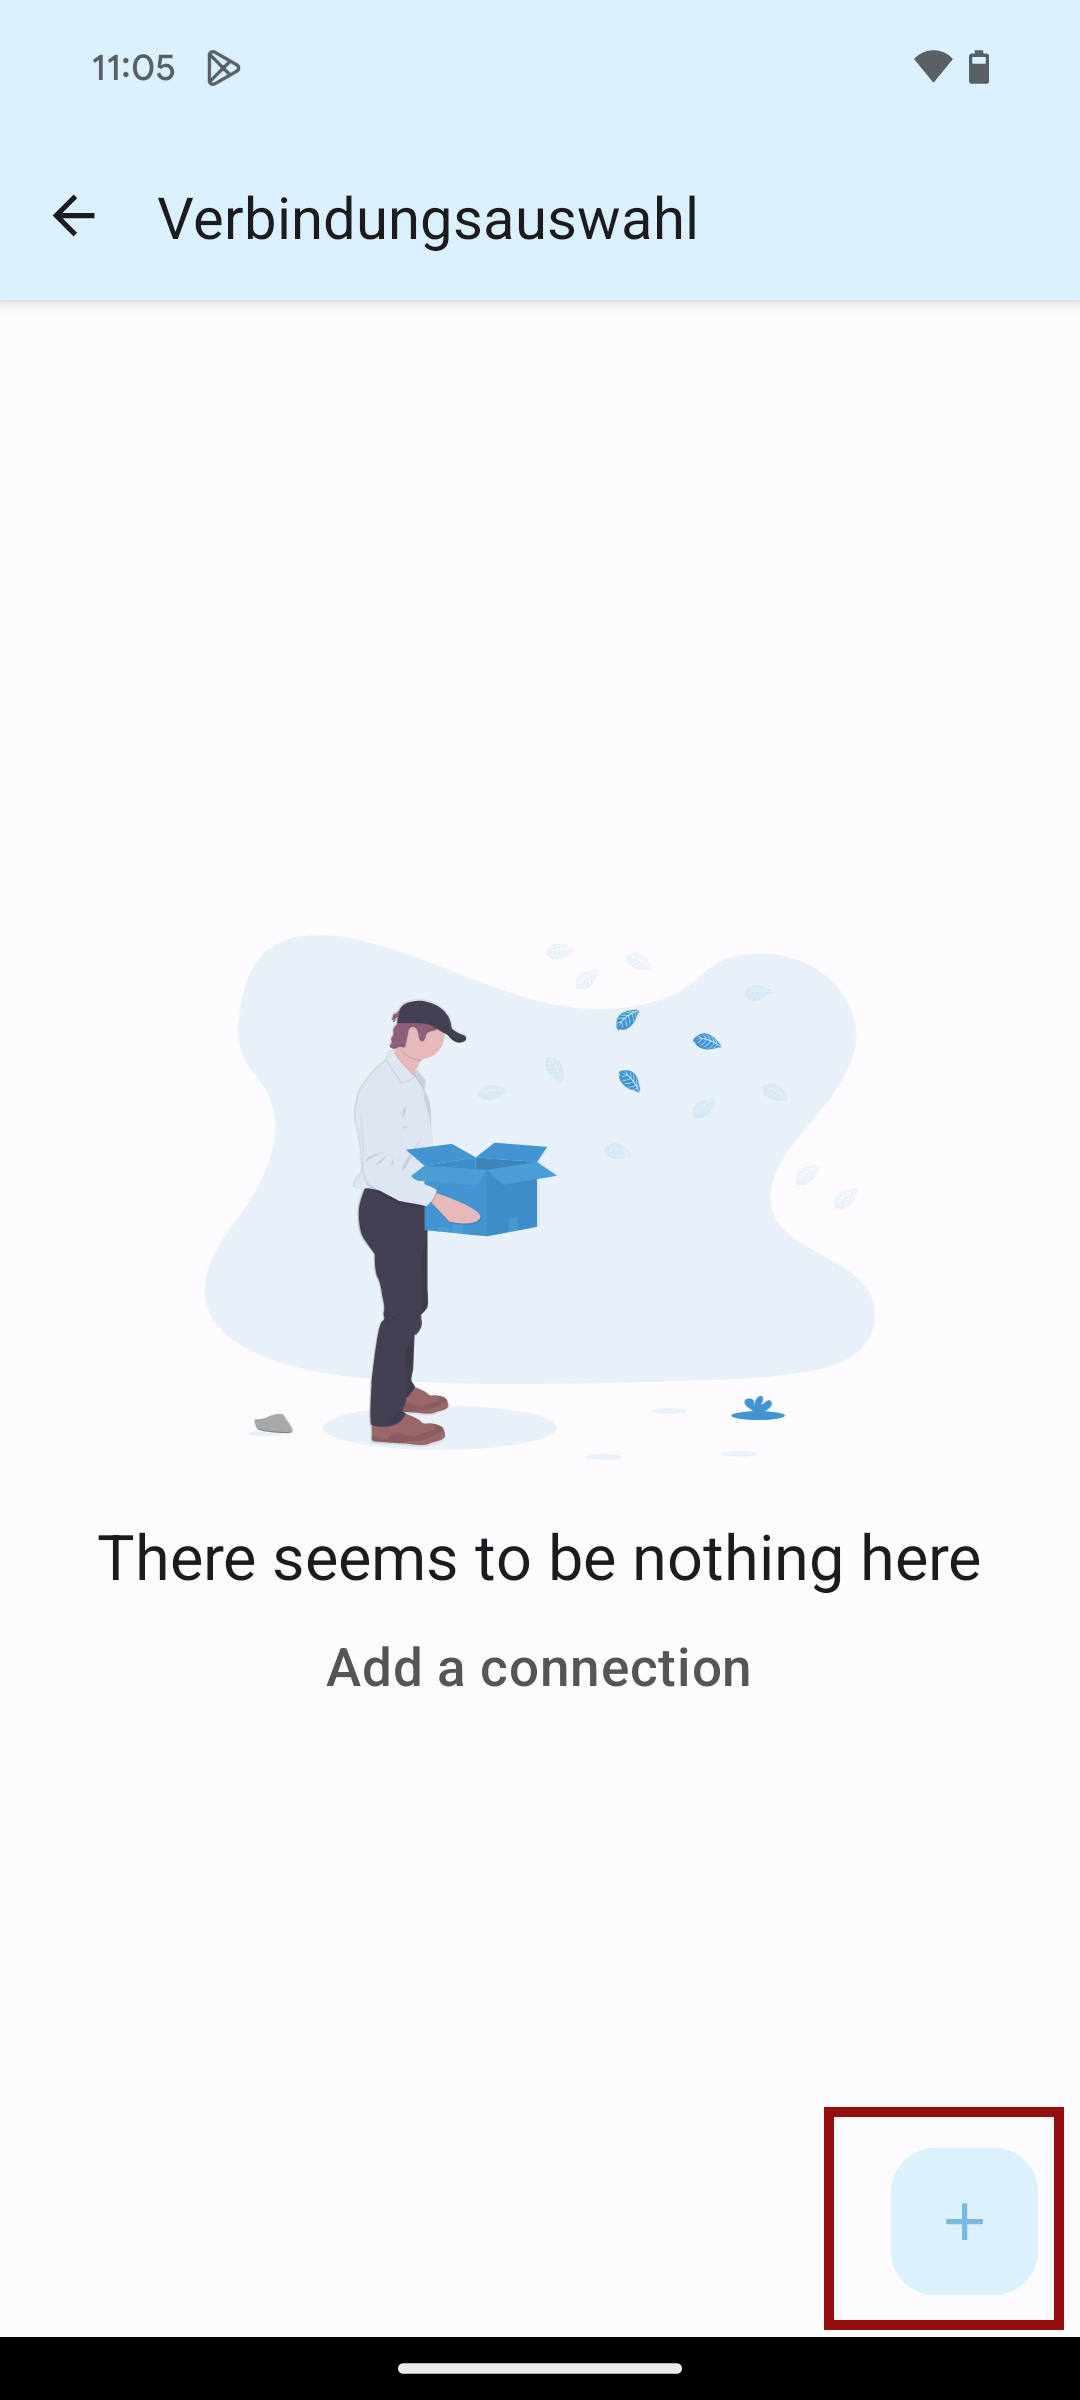
- Tippen Sie nun unten rechts auf das Plus-Symbol um eine neue VPN-Verbindung zu erzeugen.
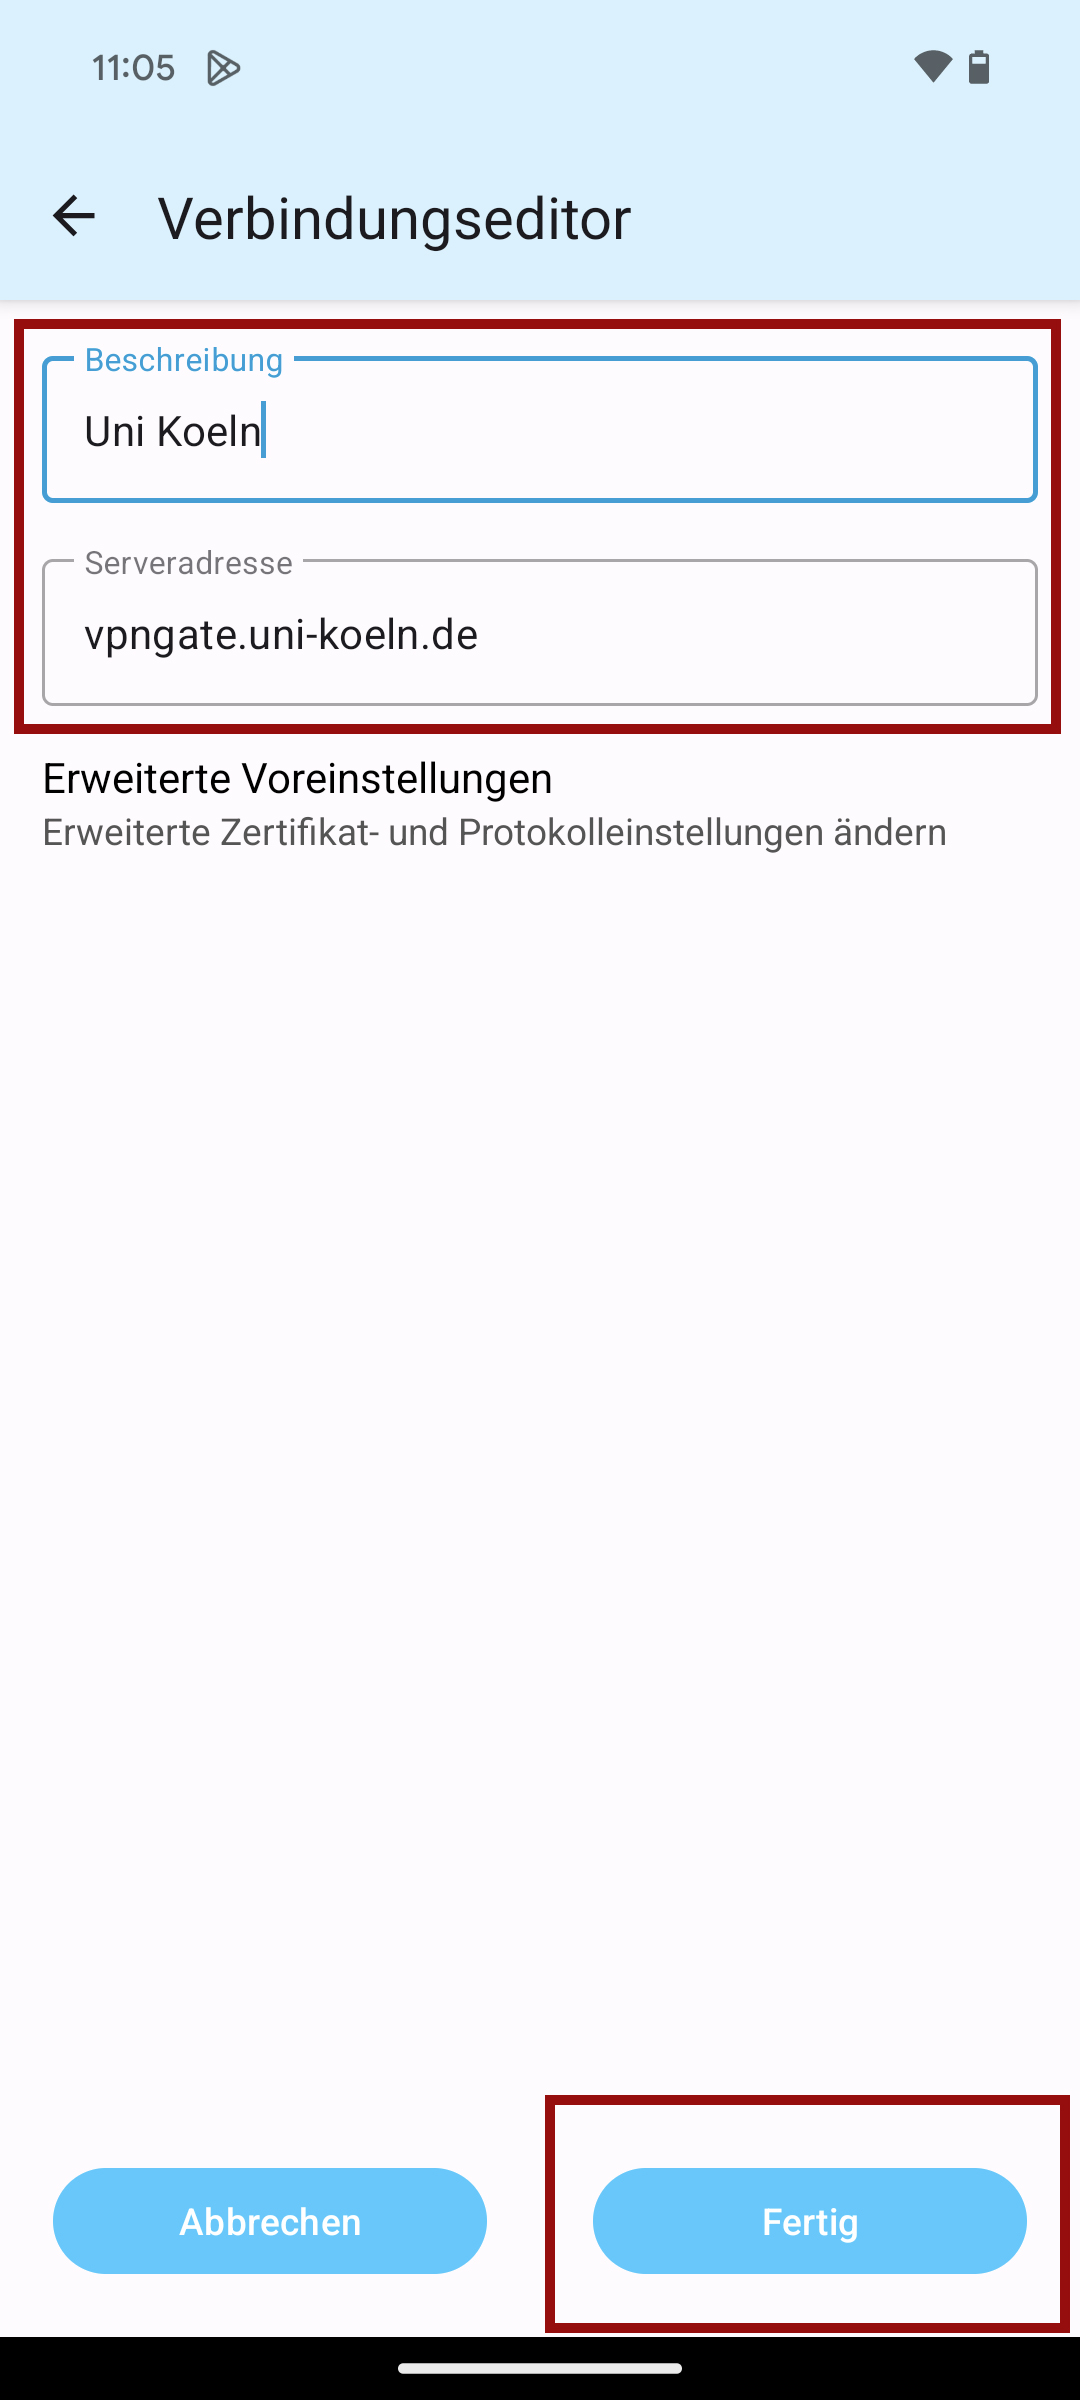
- Geben Sie einen beliebigen Namen für die VPN-Verbindung an und tragen bei "Serveradresse" vpngate.uni-koeln.de ein.
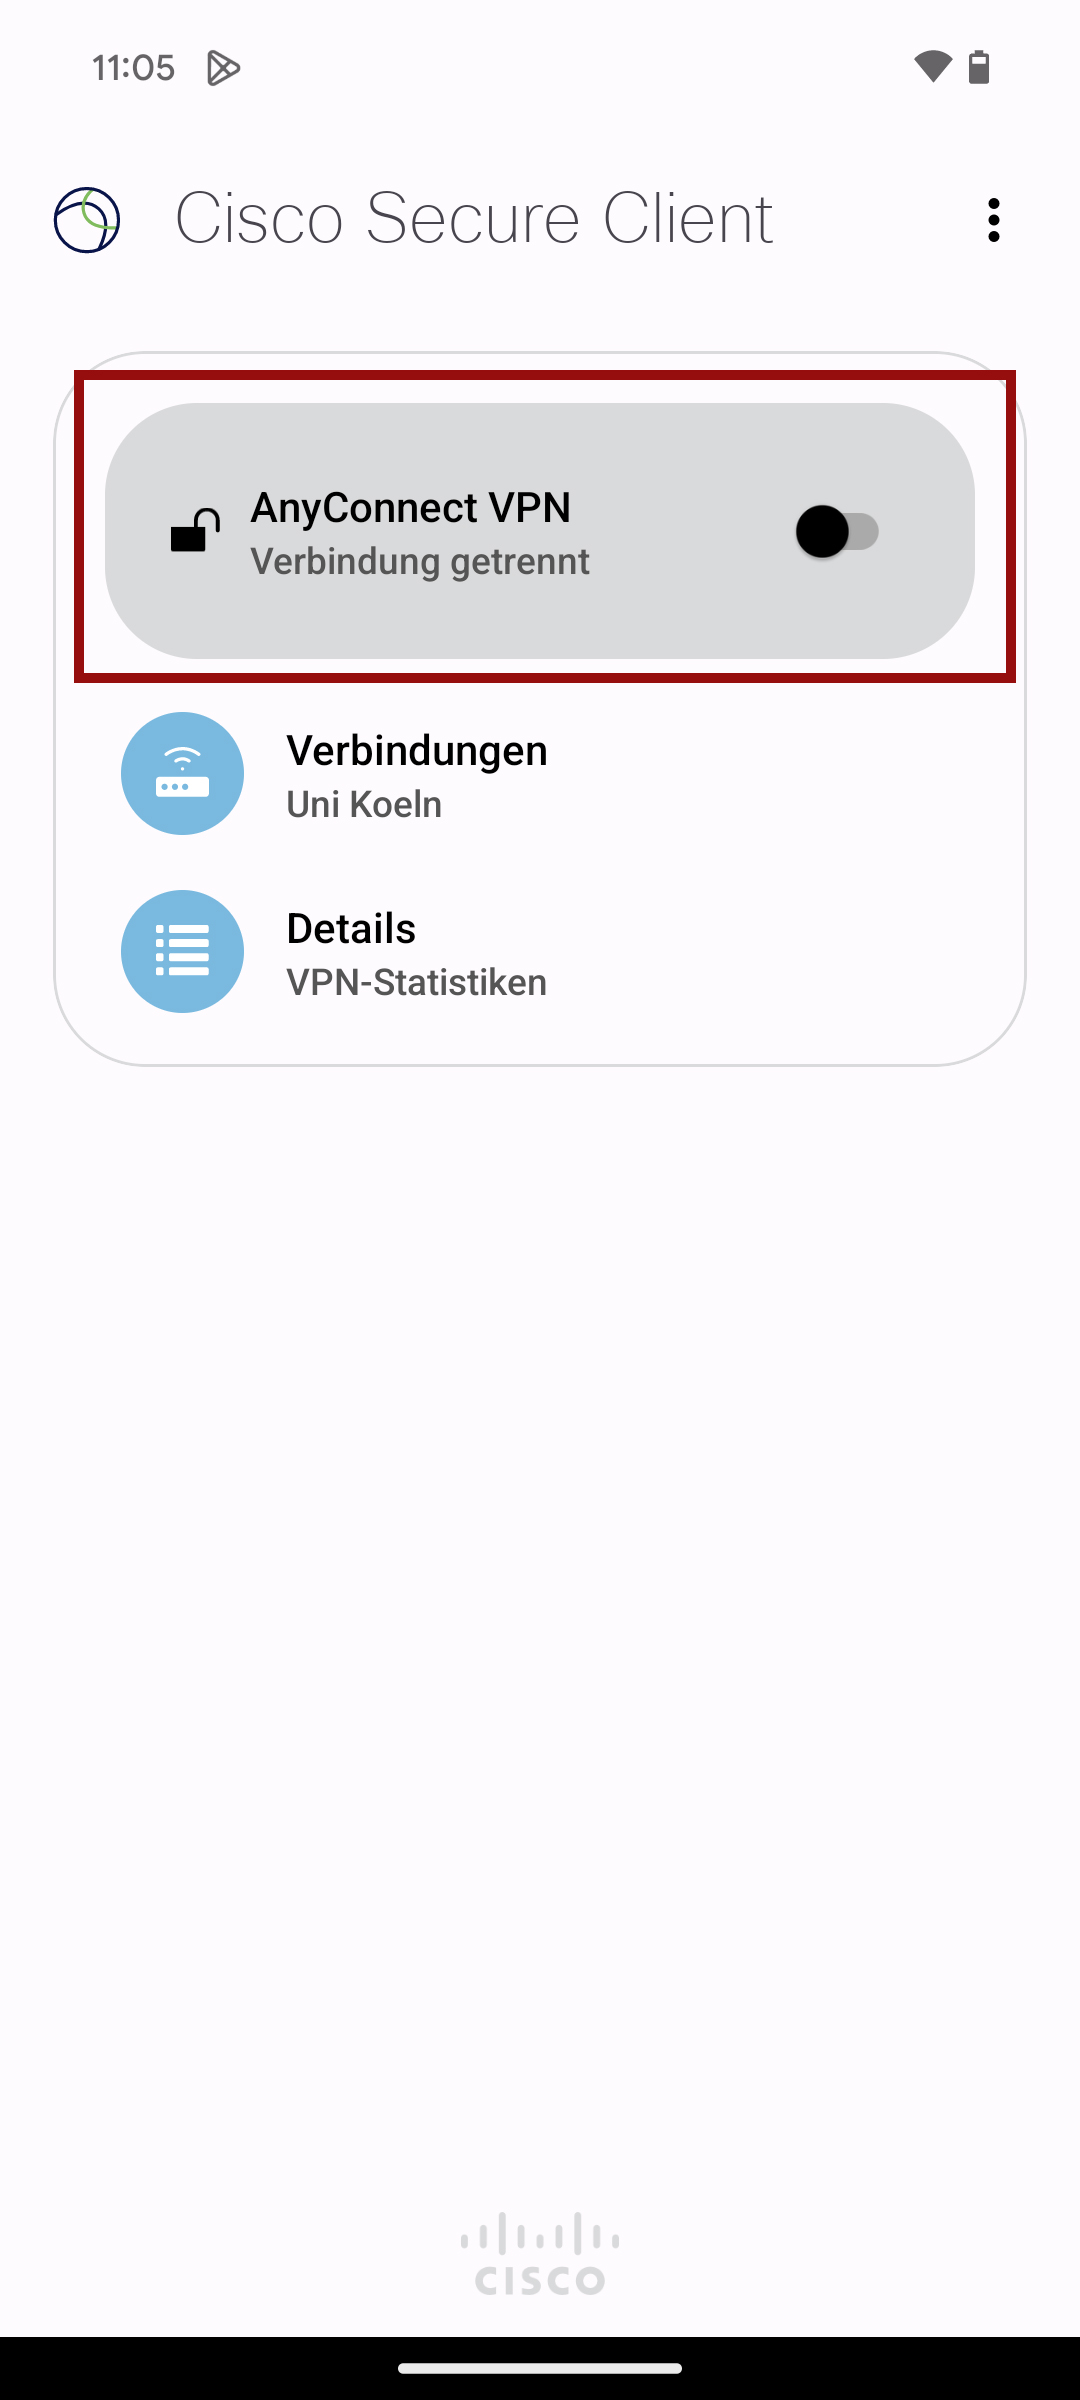
- Gehen Sie nun auf das Startmenü zurück und tippen auf den Schieberegler um die VPN-Verbindung zu aktivieren.
- Sie werden nun zu der Shibboleth-Abfrage in Ihrem Browser umgeleitet. Wenn Sie die Tunnelauswahl ändern möchten (Standardmäßig ist der Full-Tunnel eingestellt), öffnen Sie zunächst erneut die Cisco Secure Client App und wählen den Tunneltyp aus. Ansonsten überspringen Sie diesen Schritt. Informationen zu den Tunneltypen finden Sie hier.
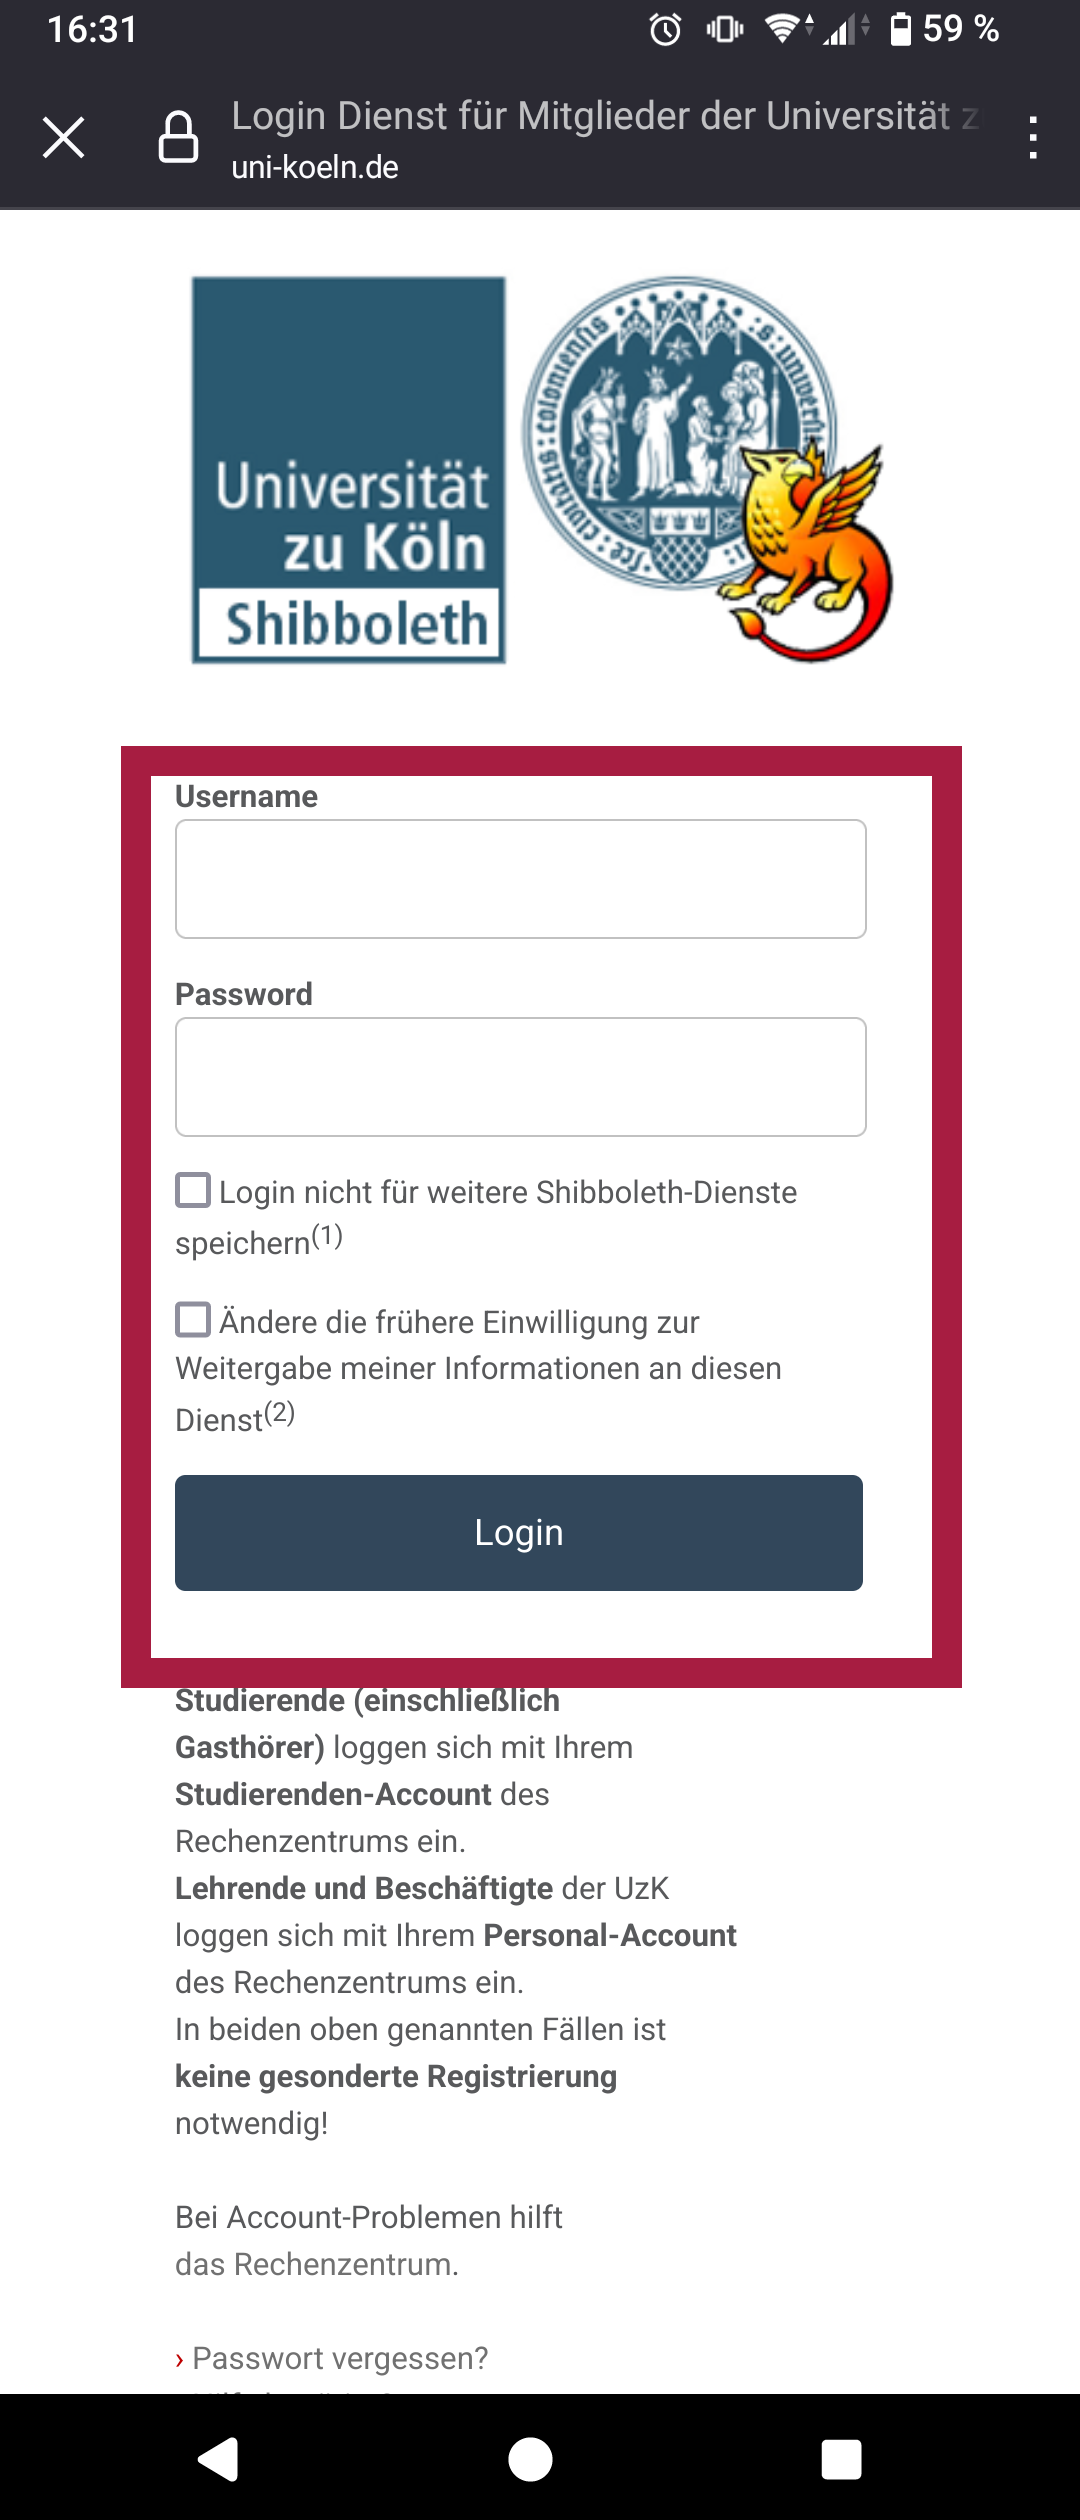
- Geben Sie Ihren Nutzernamen und Ihr Passwort in der Shibboleth-Abfrage ein und tippen auf Login.
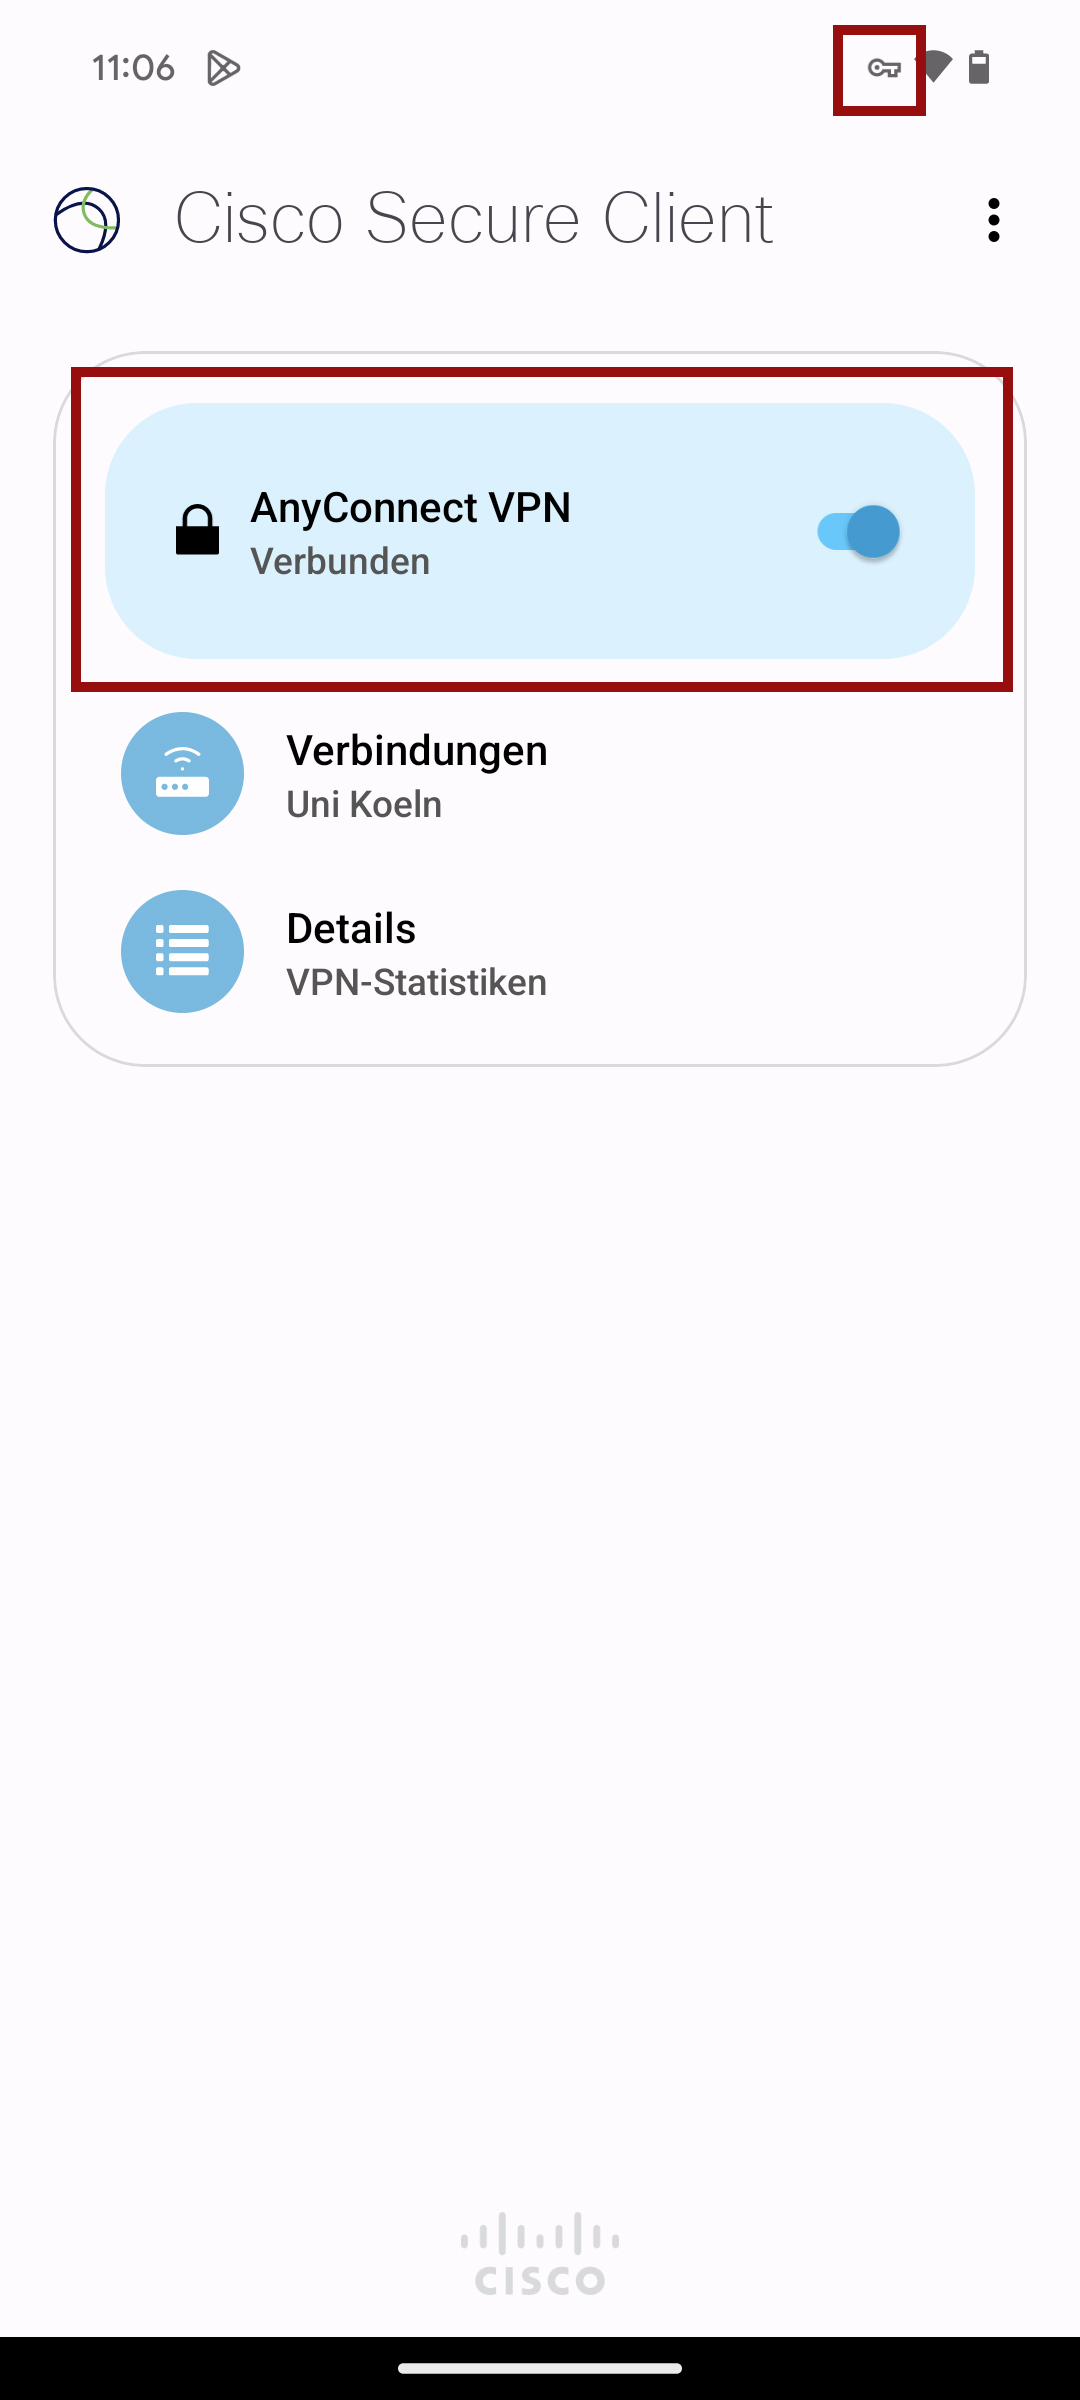
- Ihre VPN-Verbindung ist nun aktiv. Dies können Sie zum einen an dem Schlüsselsymbol oben rechts kontrollieren und der Statusanzeige in der App.
Schwierigkeiten bei der Nutzung
Sollten bei Ihnen Probleme mit der Nutzung auftreten, werfen Sie einen Blick in unsere Tipps zur Fehlerbehebung:
Contact
If you have any questions or problems, please contact the ITCC-Helpdesk