Jump to main content

SOGo - The ITCC's webmail system

SOGo as the successor to Webmail

From November 2025, the current webmail system, which is based on Horde, will be successively and irrevocably shut down. It will be replaced by a new webmail system based on the SOGo software. As the underlying, external open source system Horde is no longer being actively developed, a change is unavoidable for security reasons. In SOGo you will find all the functionalities of webmail - and more.

FAQ

What is SOGo?

SOGo is the software to which the University of Cologne’s webmail system will migrate in the near future. SOGo will replace Horde as the underlying system.

How can I use SOGo?

You can access the University of Cologne's SOGo instance at https://sogo.uni-koeln.de.

To log in, you will need your username and password, just as you do in the current system.

Are address books and calendars automatically imported into SOGo?

Unfortunately, it is not possible to automatically import calendars and address books from Webmail to SOGo. You can find a tutorial on how to transfer existing calendars from the old Horde email system to SOGo here.

When will the old webmail system be shut down?

Starting in November 2025, the current webmail system, which is based on Horde, will be phased out gradually and permanently.

I'm having trouble syncing my calendar or contacts with my Apple devices

Aktuell auftretende Probleme bei der Synchronisation von Kalendern und Adressbüchern zwischen SOGo und Apple-Gräten sind bekannt., mit möglichen Lösungstipps.

We are aware of current issues with syncing calendars and address books between SOGo and Apple devices.  Here you will find instructions with possible solutions.

I have questions about SOGo that aren't answered here. Who can I contact?

If you have any questions about SOGo, our colleagues at the ITCC-Helpdesk will be happy to assist you, working closely with other relevant staff members across the university—because providing SOGo to the university is a collaborative effort.

This ensures that you always have the information you need to make the most of SOGo.

Introduction & basics

Registration

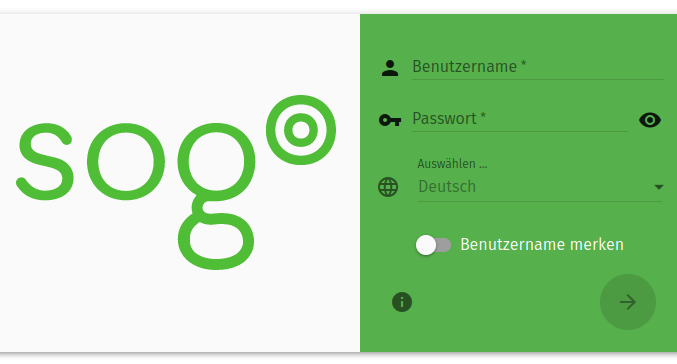
To log in to SOGo, go to https://sogo.uni-koeln.de/ in your browser. Use your staff, student or guest account username and password to log in and then click on the arrow to the right.

If you do not want to use German as your language, you must select it. You will now be taken to the updated login interface.

User interface

In the user interface, you can switch between the individual services (e-mail, calendar, address book, options):

  • At the top right you will find the calendar (orange),
  • the address book (gray),
  • the e-mails (red) and
  • the option to log out (blue).

You can enlarge the view using the icon to the left of the date (black). To open the settings, click on the cogwheel icon to the right of your user name. You can also find the individual icons in the image gallery.

Read emails

Your folders are listed in the left-hand column under your user name. To open further settings for the respective folder, select it and click on the three dots (orange).
All emails in the respective folder are listed in the middle column (under the term "Inbox"). By default, the most recent emails are displayed at the top. You can search the respective folder using the search bar (red). To the right of the magnifying glass, you can display only certain emails (only unread, only marked) (blue) and specify the sorting type (date, size, from, subject) (black). To change the order, simply uncheck the Ascending box. You can refresh the view using the round arrow.

If you receive a new message, it will be displayed in the Inbox folder. The folder name is followed by a number in brackets indicating the number of unread mails. If you have selected the Inbox folder, unread mails are highlighted in bold in the Inbox list. Click on the bold header so that the content of the message appears in the right-hand pane.

Writing e-mails

To create a message, click on the green pencil. You will find this pen at the bottom of the message list (orange). After you have selected whether you want to write the mail in the same or in a new browser window, the following mail form will open: (please allow pop-up windows in your browser!).

Now enter a recipient. To add another address, enter a comma after the address and you can enter the next e-mail address. To add further recipients via CC or BCC, click on "BCC" or "CC" on the right-hand side. You can then enter the corresponding addresses in the newly created fields.

What are BCC and CC?

When you add recipients to the CC (carbon copy) field, it means that a copy of the email is sent to those people. This is often used to inform people other than the actual recipients in the To field about the email.

BCC (blind carbon copy) is a blind copy and is used to protect the email addresses of other recipients, as the other email addresses are not visible to them. For addresses in BCC, the recipient’s address and their own address are visible. For the recipient’s address, none of the BCC addresses are visible.

Now enter your subject, below which you will find the message field where you can enter the message.
To add attachments to the email, click on the paper clip at the bottom right (green).
Click on the "Send" button (blue) to send your email on its way.
You have further options in the top bar:

  • Expand the message window (red)
  • Select another identity, if you have created one (gray)
  • Save the email in the draft folder (black)
  • Close the window. Attention the e-mail will be deleted (orange)

Answer e-mails

To reply to a message, select "Reply" (=arrow to the left (black)): You will see that the original message is already marked as a "Quote". Write your reply above or below or line by line in between and send the reply by clicking "Send".

Manage e-mails

By clicking on the header symbol in front of an e-mail, you can mark it (as soon as an e-mail is marked, all other header symbols change to boxes). In the header of the email list, you will see the icons for

  • Cancel selection (red)
  • Select all mails (orange)
  • Move to trash (blue)
  • Move to spam folder (black)

By clicking on the three dots, you have the option of marking, forwarding, moving, copying, saving etc. the selected emails (gray)
You can move marked emails to another folder using drag-and-drop or use the advanced options (three dots).

Create folder

When creating folders, click on the triple dot next to the parent folder or your account [Fig. 1] (red), select "New folder" (orange) [Fig. 2] and enter the folder name.

Example: A new folder is to be created under your e-mail address: Highlight the e-mail address, click on the adjacent triple dot, menu item "New folder ..." Select, enter the name and confirm with Enter.

Important
No folders may be created below Inbox. If you use different clients, this will lead to synchronization problems.

Delete folder

To delete a folder, select the folder to be deleted, click on the triple dot [Fig. 1] (black) and select "Delete" [Fig. 2].

Important
Never delete the "Inbox", "Drafts", "Sent", "Spam" or "Trash" folders! Only delete folders you have created yourself!

Share folders with other users

In SOGo, you can share mail folders with other users at the university.

  1. To do this, click on the three vertical dots to the right of the respective folder [screenshot 1] and select "Sharing" (at the bottom of the context menu) [screenshot 2].
  2. Now search for the corresponding user name in the new window by typing in the first few letters [Fig. 3]. You will now be shown suggestions. Click on the corresponding user name.
  3. A menu will now open where you can assign special authorizations for the corresponding user name [Fig. 4]. By clicking on the dustbin symbol, you can delete the share and by clicking on the symbol to the left of it, you can activate or deactivate all permissions at once.
    To save the settings for the permissions, click on Save at the bottom left of the window.

If you want to change the sharing of folders, first proceed in the same way and click on the three vertical dots next to the corresponding folder and click on "Sharing". In the list below the search field, select the user name for which you would like to edit the rights assignment for this mail folder [Fig. 5]. You can then edit the settings. Do not forget to save your settings.

Do not be confused by the user "cyrus". This is a system user and can be ignored.

Search emails

Click to the right of the magnifying glass icon to start the quick search [Fig. 1]. In the field, you can now search for the subject or sender in the selected mail folder.

If you would like to perform an advanced search, click on the three dots on the right-hand side of the field [Fig. 2]. A new window will now open in which you can refine your search:

  • To search in all folders, click on the selection box under "Search messages in" and then select the top entry ([your username]@uni-koeln.de).
  • To perform a search that matches one of the search criteria, click on the gear icon and select "Match at least one of the following patterns".

To start the search, click on "Search" at the bottom right.

Further instructions